


|
How To Install Your New Wood Blinds Congratulations on your purchase of a quality blind. Your blind has been custom made to your specifications and is one of the finest window treatments available. Before you unwrap your blinds, please take a few moments to read these instructions. With careful installation and periodic cleaning your blind will provide you with many years of trouble free service. | |||
 |
 | ||
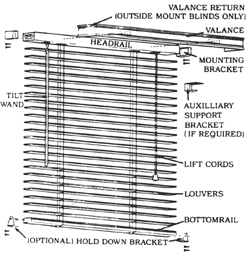
Your wood blind includes the following:
To install your blind you will need the following tools:
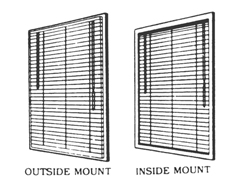
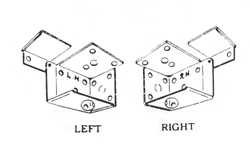
Installation instructions Unwrap the blindDo not untie its cord at this time. Hold the blind against the window to determine proper placement. it will either fit inside the window casing (inside mount) or outside the window casing or wall (outside mount). This will determine where and how your installation brackets should be attached. Note that the brackets are marked R.H.(right hand) and L.H.(left hand). | |||
 |
 | ||
|
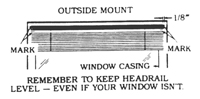
If your blind is to be installed as an outside mount. Hold the blind level and center against the window casing. Mark the casing with a pencil just below the headrail on each end. Also mark the window casing 1/8" beyond the the end of the headrail. The right and left installation brackets will be placed on these marks. |
 | ||
|
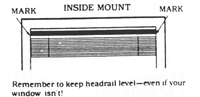
For an inside mount,make certain the headrail is level and clear of obstructions. Make pencil marks below the headrail on each end. The right hand and left hand installation brackets will be placed on these marks. |
 | ||
|
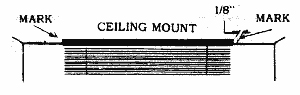
For a ceiling or overhead mount, hold the blind against the ceiling centered in front of the window and make pencil marks 1/8" beyond the end of the headrail. The right and left installation brackets will be placed on these marks. |
 | ||
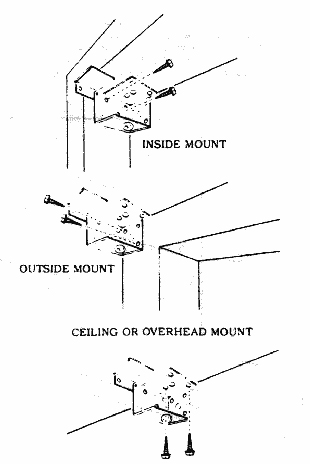
| Mounting Installation Brackets The brackets may be mounted using two screws in several different orientations depending upon your needs: | |||
|
 | ||
|
Hint: Smearing a little bar soap on the screw threads will make them drive more easily. Open the bracket's swivel cover with a screwdriver. Hold the bracket against the mounting surface and align it with the pencil marks. Using a pencil, mark the location of two diagonal holes for the mounting screws. you may drill holes for the screws using a 7/64" drill bit, or if a drill is not available use a finishing nail and a hammer or an awl to make small holes to start the screws. Keep the screws at least 1/4" form the edge of the wood to prevent it from splitting. 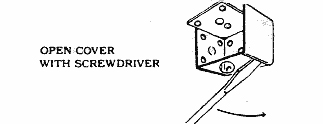
| |||
|
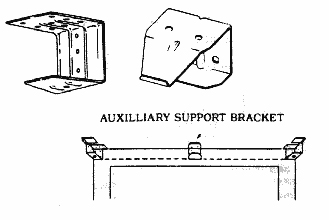
Auxiliary Support Brackets If an auxiliary support bracket is included with your blind it should be placed in line with the installation brackets. |
 | ||
|
The auxiliary support should not be in line vertically with the blind's cord or ladder as it may interfere with the blind's lifting and tilting mechanism. | |||
|
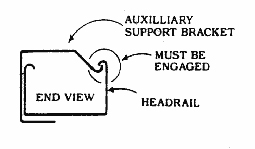
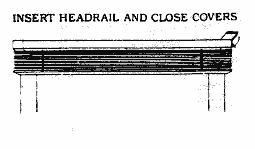
Headrail Installation Insert the headrail into the mounting brackets. If an auxiliary support bracket is used. be sure that it is properly engaged with the headrail. |
 | ||
|
Close the swivel covers to lock the headrail in place. |
 | ||
If your blind is not sitting snugly left to right: open the mounting brackets, remove the headrail and pry out the two tabs at the end of the headrail a bit with a screwdriver. | |||
|
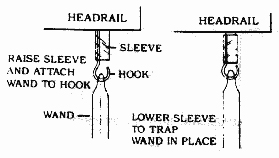
Wand Attachment Attach the wand to the hook and slide the sleeve down to trap the wand in place. |
 | ||
|
Now you will be able to adjust the angle of the slats by turning the wand. CAUTION: Do not continue to turn the wand after it starts to bind as this may damage the tilt mechanism. Valance Installation If your blind was ordered as an outside mount, the valance is supplied with pre-mounted returns. No returns are included with an inside mount. | |||
|
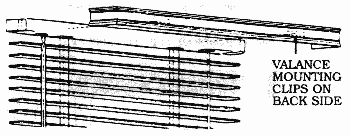
Attach valance clips to the back of the valance. Position the valance on the headrail and snap it into place. |
 |
The valance may be detached and re-installed as required. Adjusting Blind Height To raise or lower your blind, pull the cords downward and towards the center of the blind. Raise or lower the blind to the desired height.  Now pull the cords back past the end of the blind and release them they will lock automatically. Optional Hold Down Brackets If you ordered optional hold down brackets to keep the bottomrail stationary, follow these instructions. Fully extend the blind. Insert the bracket in holes as shown in a. and b. Mark the hole location where the screws are to be inserted. Try to keep the holes at leased 1/4" from the edge of the wood to avoid splitting. You may use a 1/16" drill bit or if no drill is available, use a finishing nail and a hammer to make small holes to start the screws. (a little soap on the screw threads may help prevent splitting the wood) 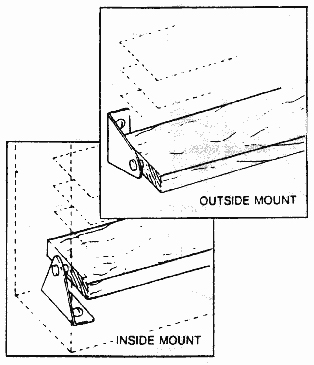 Cleaning Your blind is easily cleaned by extending it to its full length and closing the louvers (not tightly) first in one direction and then the other. Wipe the with a soft cloth or clean them with your vacum cleaner's brush attachment. Care for these blinds as you do other wood furnishings. DO NOT USE WATER OR ABRASIVE CLEANERS. These Blinds are made of fine, natural woods, carefully finished, irregularities which may appear form slat to slat are characteristic of genuine wood and contribute to its beauty. |
|
Store Hours
Showroom : 3140-14 Ave , NE
( Unit 12) Calgary, Alberta, Postal code:T2A 6J4"Click here for directions

| Monday to Sunday - Appointment Only |
( Unit 12) Calgary, Alberta, Postal code:T2A 6J4"Click here for directions


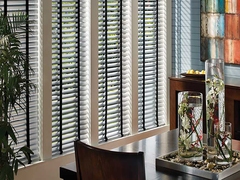
Blinds
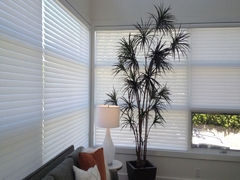
Shades
- Cellular Shades
- Zebra (Latest)
- Combi Roll(Latest)
- Double View Roller
- Shangri-La(Latest)
- Sheer Horizontals
- Solar Roller Shades
- Designer & Blackout Roller
- Sliding Panels
- Sheer Verticals
- Cellular Verticals
- Vertical Sheer
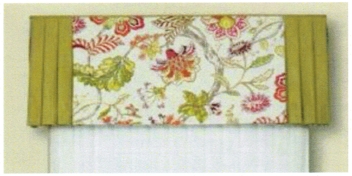
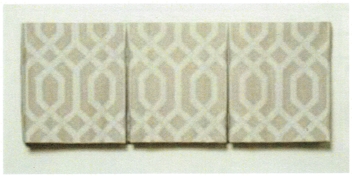
Specialty Products
GET A QUICK QUOTE
Top